
Content
Why Bother Making Your Own Gel?
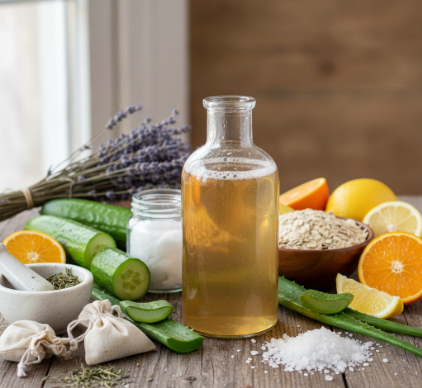
Beyond just avoiding synthetic ingredients, there are compelling reasons to embrace DIY flaxseed gel: Naturally Nourishing (Looking!): Flaxseeds are rich in omega-3 fatty acids and Vitamin E. While applying them topically doesn’t provide the same internal health benefits as eating them, the gel itself is inherently moisturizing. It helps hair attract and retain water, promoting a hydrated, supple feel and enhancing shine. Amazing Definition and Hold: This stuff works! The mucilage extracted from the seeds creates a slippery gel that coats the hair strands. As it dries, it forms a gentle cast that encourages curl clumping and provides a soft, touchable hold that lasts. Super Affordable: A bag of whole flaxseeds is incredibly inexpensive and will yield numerous batches of gel. Compared to the cost of many boutique natural hair gels, the savings are significant. Customizable: This is where the fun begins! Once you master the basic recipe, you can tweak it to suit your hair’s specific needs. Add a few drops of essential oils for fragrance (avoiding therapeutic claims), a dollop of aloe vera juice for extra moisture, or a touch of vegetable glycerin to act as a humectant. Simple Ingredients: Seriously, the basic recipe requires just two things: flaxseeds and water. It doesn’t get much simpler or cleaner than that.Gather Your Supplies
Ready to become a kitchen cosmetologist? You don’t need fancy equipment. Here’s the basic list:- Whole Flaxseeds (Brown or golden work equally well – about 1/4 cup to start)
- Filtered Water (Around 2 cups)
- A Small Saucepan
- A Whisk or Spoon
- A Fine Mesh Sieve, Cheesecloth, or (clean!) Nylon Stocking for straining
- A Clean Jar or Bottle for storage (preferably airtight)
The Basic Flaxseed Gel Recipe: Step-by-Step
Making the gel is a quick process, usually taking less than 15 minutes on the stovetop. Step 1: Combine Ingredients: Pour your water into the saucepan. Add the flaxseeds. Give them a quick stir. Step 2: Bring to a Boil: Place the saucepan over medium-high heat. Bring the mixture to a rolling boil, stirring occasionally to prevent the seeds from sticking to the bottom of the pan. Step 3: Simmer and Watch: Once boiling, reduce the heat to medium or medium-low. Let it simmer. This is where the magic happens. You’ll start to see the water thicken and become viscous, forming a gel-like consistency. Keep stirring gently. You might see a white, frothy foam appear – that’s normal. Step 4: Check Consistency: How long you simmer depends on your desired thickness. For a looser gel (good for finer hair or waves), simmer for about 4-7 minutes after it starts boiling. For a thicker gel (better for tighter curls or stronger hold), simmer for 8-12 minutes. A good test is to lift the spoon or whisk; if a gel-like trail follows, it’s likely ready. Remember, the gel will thicken considerably more as it cools.Don’t Overcook! It’s crucial not to simmer the mixture for too long. If the gel becomes overly thick in the pot, it will be extremely difficult, if not impossible, to strain the seeds out. Aim for a consistency resembling egg whites while it’s still hot.Step 5: Strain Immediately: This is the most critical step, and speed helps! As soon as you take the pot off the heat, pour the mixture through your chosen straining tool (sieve, cheesecloth over a bowl, or stocking) into your clean container. The gel separates from the seeds much more easily when hot. If you wait for it to cool, you’ll have a very hard time straining. Step 6: Cool Completely: Allow the strained gel to cool down to room temperature before using or storing it. It will continue to thicken as it cools.
Troubleshooting Common Issues
Gel Too Thin? You likely didn’t simmer it long enough, or perhaps used too much water for the amount of seeds. Next time, try simmering for a few extra minutes or slightly reducing the water ratio. You can also try re-boiling the thin gel (without the seeds) for a very short time to thicken it further, but be cautious. Gel Too Thick (Hard to Strain)? You simmered it for too long. Next time, reduce the simmering time significantly. If you’re stuck with an overly thick batch you can’t strain, try adding a tiny bit more boiling water to loosen it slightly before attempting to strain again, though this may impact the final hold. Flakes? Flaking can sometimes occur if too much gel is used, if it interacts poorly with other products already in your hair (like leave-in conditioners), or if the gel was cooked down too much, concentrating the proteins. Experiment with using less gel or ensuring your hair is clarified and free of buildup. Stickiness? Pure flaxseed gel shouldn’t feel overly sticky once dry unless too much is applied. If you’ve added other ingredients like honey or a lot of glycerin, those could contribute to a sticky feel.Customizing Your Creation
Once you’ve nailed the basic recipe, feel free to experiment!Adding Fragrance & Extras:
After the gel has cooled slightly (but is still warm enough to easily incorporate additions), you can stir in a few extras. Remember to add these *after* straining.- Essential Oils: Add 5-10 drops of hair-friendly essential oils like lavender, rosemary, peppermint, or geranium for a pleasant scent. Always choose high-quality oils and perform a patch test first, as some can be irritating. Focus on scent rather than purported therapeutic benefits to stay compliant.
- Aloe Vera Gel/Juice: Add a tablespoon or two for extra moisture and slip. Ensure it’s pure aloe without added thickeners or alcohol.
- Vegetable Glycerin: A teaspoon can help attract moisture to the hair (humectant), but use sparingly as too much can feel sticky in humid conditions.
- Vitamin E Oil: A few drops can act as a mild preservative and add perceived conditioning properties.
Always Patch Test! Whenever adding new ingredients, especially essential oils, test a small amount of the finished gel on your inner arm. Wait 24 hours to ensure no irritation occurs before applying it all over your hair and scalp.
How to Apply Your Homemade Gel
Application technique is key to getting the most out of your flaxseed gel. Start with Wet or Damp Hair: Flaxseed gel works best when applied to wet or very damp hair. This helps with even distribution and encourages curl clumping as the hair dries. Less is More (Initially): Start with a small amount (quarter-sized, perhaps) and emulsify it in your hands. It has a unique, slippery texture. Application Methods:- Raking: Rake the gel through sections of your hair using your fingers, from root to tip.
- Praying Hands: Smooth the gel over the surface of your hair sections using flattened palms (“praying hands” method). This is great for reducing frizz on the outer canopy.
- Scrunching: Cup sections of your hair from the ends and gently scrunch upwards towards the scalp. This encourages curl formation.


