
Content
Why Bother Making Your Own Jelly Cleanser?
Good question! Beyond the sheer fun of creating something yourself, DIY offers a few perks. You get to control exactly what goes into your product. No mysterious chemicals or ingredients you can’t pronounce (unless you choose them!). It can often be more budget-friendly in the long run, especially if you fall in love with your creation. Plus, there’s a unique satisfaction in using something you’ve made with your own hands. It connects you more to your routine. And let’s be honest, achieving that perfect jelly consistency is a pretty cool kitchen experiment. This recipe is designed to be gentle, but remember, everyone’s skin is different. We’ll focus on creating the texture and basic cleansing properties, keeping it simple and customizable later if you become more adventurous.Gather Your Jelly-Making Arsenal: Ingredients
The magic behind the jelly texture often comes from a gelling agent. We’ll use one that’s readily available and relatively easy to work with. Here’s what you’ll typically need:- Distilled Water or Hydrosol: About 1/2 cup (120ml). Distilled water is crucial to avoid introducing impurities or minerals from tap water. Alternatively, use a gentle hydrosol like rosewater or chamomile water for a subtle scent and potential soothing properties.
- Vegetable Glycerin: 1 tablespoon (15ml). This is a humectant, meaning it helps draw moisture to the skin, preventing that tight, stripped feeling after cleansing.
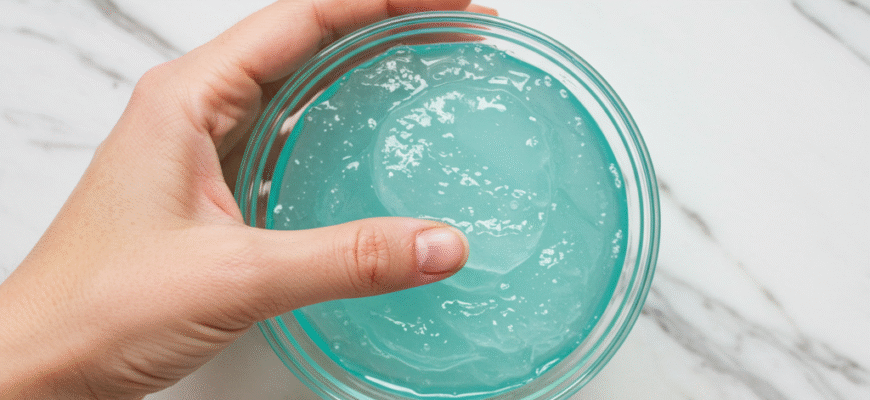
- Xanthan Gum or Guar Gum: 1/4 to 1/2 teaspoon. This is your gelling agent! Start with the smaller amount and add more if needed to reach your desired jelly consistency. Xanthan gum usually creates a clearer gel than guar gum.
- Mild Liquid Surfactant (Optional but Recommended for Cleansing): 1-2 tablespoons (15-30ml). This is what actually provides the cleansing power by lifting dirt and oil. Look for gentle, sulfate-free options like Coco Glucoside, Decyl Glucoside, or Cocamidopropyl Betaine. If you skip this, your jelly will be more of a hydrating rinse-off mask than a true cleanser.
- Preservative (Highly Recommended): At the manufacturer’s recommended usage rate (usually 0.5% to 1%). Because this recipe contains water, a broad-spectrum preservative is essential to prevent bacteria, mold, and yeast growth. Options include Liquid Germall Plus, Optiphen Plus, or other cosmetic-grade preservatives suitable for water-based formulas. Do not skip this if you plan to keep the cleanser for more than a day or two in the fridge.
- Essential Oil or Fragrance Oil (Optional): 1-3 drops. For scent only. Use skin-safe essential oils like lavender or chamomile, properly diluted. Avoid photosensitive oils like citrus if using in a leave-near product (though this is rinse-off). Fragrance oils specifically designed for cosmetic use are another option. Always patch test!
- Skin-Safe Colorant (Optional): A tiny drop of liquid cosmetic colorant or a pinch of mica powder can make your jelly visually appealing. Ensure it’s approved for cosmetic use.
Important Safety Note: Whenever you introduce water into a DIY recipe that you plan to keep for more than a few days, a broad-spectrum preservative is crucial to prevent microbial growth. Unpreserved water-based products can quickly become unsafe for use on skin. Always follow the manufacturer’s instructions for your chosen preservative regarding usage rate and incorporation method.
The Method to the Jelly Madness: Step-by-Step
Ready to get jiggly? Let’s make some cleanser! Step 1: Prepare Your Workspace Cleanliness is key in DIY cosmetics. Sanitize your workspace, measuring spoons, bowls, and whisk. You can wash everything thoroughly with hot, soapy water and then wipe down surfaces and tools with 70% isopropyl alcohol, allowing it to air dry. Step 2: Combine Liquid Ingredients (Except Surfactant) In a sanitized heat-resistant beaker or small bowl, combine your distilled water (or hydrosol) and vegetable glycerin. Stir gently to mix. Step 3: Disperse the Gelling Agent This step is crucial for avoiding clumps! You have two main methods:- Method A (Glycerin Slurry): In a separate tiny bowl, mix your xanthan gum or guar gum directly into the vegetable glycerin until it forms a smooth, lump-free slurry. Then, add this slurry to your water/hydrosol mixture while whisking vigorously.
- Method B (Vortex): While whisking the water/hydrosol/glycerin mixture rapidly to create a vortex (a small whirlpool), slowly sprinkle the xanthan gum or guar gum into the vortex. Keep whisking very briskly until it’s fully incorporated.
Getting That Perfect Jelly Texture
The star of this show is, of course, the texture! Achieving that satisfying jiggle is mostly down to the gelling agent.- Gum Concentration: The amount of xanthan or guar gum is the primary driver. Start low (1/4 tsp) and gradually increase if needed. Too much will make it stiff and rubbery, too little and it won’t gel.
- Hydration Time: Give the gum enough time to fully absorb the water and swell. Whisking intermittently helps ensure even hydration.
- Temperature: While this is a cold-process recipe, slightly warming the water/hydrosol phase (not boiling, just warm to the touch) can sometimes help the gum hydrate faster. Ensure it cools before adding heat-sensitive ingredients like preservatives and essential oils.
- Mixing Technique: Proper dispersion (using the slurry or vortex method) is vital to prevent lumps, which ruin the smooth jelly feel. A stick blender used on low speed in short bursts can also help smooth out minor lumps, but be careful not to incorporate too much air.
How to Use Your Homemade Jelly Cleanser
Using your DIY jelly cleanser is simple:- Scoop or pump a small amount (about a dime or nickel size) onto your fingertips.
- Apply to a damp face. The water helps the cleanser spread and lather (if you included a surfactant).
- Gently massage the jelly onto your skin in circular motions. Enjoy the cool, slippery texture! If you added a surfactant, you might notice a very light lather.
- Rinse thoroughly with lukewarm water.
- Pat your skin dry gently with a clean towel.
- Follow up with your usual toner, serum, and moisturizer.
Customization Ideas
Once you’ve mastered the basic recipe, feel free to experiment (always patch-testing new variations!):- Different Hydrosols: Try cucumber hydrosol for cooling, lavender for calming, or green tea extract (added to the water phase) for antioxidant properties.
- Add Panthenol (Pro-Vitamin B5): A small amount (around 0.5-1%) can add extra hydrating benefits. Dissolve it in the water phase.
- Gentle Exfoliants: For a very mild exfoliating effect, you could *consider* adding finely milled powders like bamboo powder or colloidal oatmeal towards the end of mixing, but be cautious not to make it abrasive. This changes the texture significantly.
Verified Tip: Always label your homemade creations clearly with the name, date made, and ingredients used. Since this contains water and a preservative, note the expiry based on your preservative’s guidelines (often 3-6 months if using a reliable broad-spectrum preservative correctly). Proper labeling prevents misuse and helps you track batch effectiveness.


