
Content
Why Choose Homemade?
Crafting your own calendula salve offers several advantages. Firstly, you control the ingredients. You know exactly what goes into your preparation – no hidden preservatives, fragrances, or chemicals you might be sensitive to. You can choose high-quality oils and waxes, ensuring a pure and simple final product. Secondly, it’s often more economical in the long run, especially if you enjoy making batches for yourself or as thoughtful gifts. Lastly, there’s the undeniable pleasure of the process itself – the slow infusion, the gentle melting, the pouring of the warm liquid – it connects you to the ingredients and the final product in a special way.Gathering Your Simple Supplies
The beauty of this salve lies in its simplicity. You don’t need a complicated laboratory setup. Here’s what you’ll typically require:- Dried Calendula Flowers: You’ll need about half a cup to a full cup, depending on the size of your batch. Ensure they are fully dried to prevent introducing moisture (and potential spoilage) into your oil. You can often find these at health food stores, apothecaries, or online herb suppliers.
- Carrier Oil: Around 1 to 1.5 cups. Olive oil is a classic, accessible choice. Sweet almond oil is lighter and absorbs well. Jojoba oil is very similar to the skin’s natural sebum. Choose an oil you like and that suits your skin. Quality matters here, so opt for a good cold-pressed oil if possible.
- Beeswax: Approximately 1/4 cup of pellets or grated beeswax. This gives the salve its solid structure. The amount can be adjusted slightly – use a bit less for a softer salve, a bit more for a firmer one. For a vegan alternative, Candelilla wax can be used, but you’ll typically need less (start with about half the amount of beeswax and adjust).
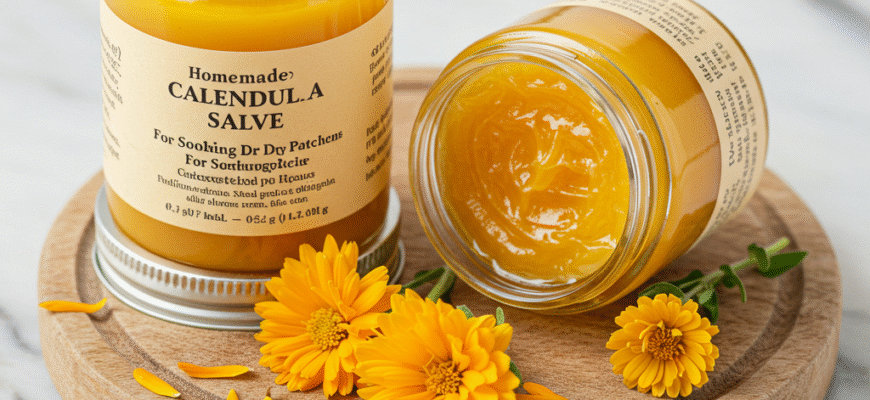
- Clean Jars or Tins: Small glass jars or metal tins with lids are perfect for storing your finished salve. Ensure they are thoroughly cleaned and dried before use.
- Optional: Vitamin E Oil: A few drops can be added as a natural antioxidant, potentially helping to extend the shelf life slightly and adding its own skin-friendly properties.
- Optional: Essential Oils: A few drops of gentle essential oils like lavender or chamomile can be added for scent, but this is entirely optional. Use them sparingly, as the salve already has a subtle, pleasant scent from the calendula itself.
Step-by-Step: Crafting Your Golden Salve
Step 1: Infusing the Calendula Oil
This is the heart of the process, where the oil takes on the properties of the calendula flowers. There are two main methods: The Slow (Cold) Infusion Method: This traditional method requires patience but is incredibly simple. Place your dried calendula flowers in a clean, dry glass jar. Pour your chosen carrier oil over the flowers, ensuring they are completely submerged. Stir gently to release any air bubbles. Seal the jar tightly and place it in a sunny windowsill (or just a warm spot) for about 4 to 6 weeks. Give the jar a gentle shake every day or two. The warmth and time will slowly draw the beneficial compounds from the flowers into the oil. The oil will gradually take on a beautiful golden-orange hue. The Quick (Warm) Infusion Method: If patience isn’t your virtue, you can speed things up using gentle heat. Create a makeshift double boiler by placing the calendula flowers and oil in a heatproof glass jar or measuring cup. Set this container inside a saucepan filled with a few inches of water. Heat the water gently over low heat – you want it to be warm, barely simmering, never boiling. High heat can damage the delicate properties of the oil and flowers. Let the oil infuse gently for at least 2-4 hours, keeping the heat very low and monitoring the water level in the saucepan. The longer you infuse, the potentially more potent the oil will become. Again, the oil should turn a lovely golden colour.Step 2: Straining the Infused Oil
Once your oil is beautifully infused (either through the slow or quick method), it’s time to separate the oil from the plant material. Line a fine-mesh sieve with a couple of layers of cheesecloth or a clean piece of muslin. Place the sieve over a clean bowl or measuring cup. Carefully pour the oil and flower mixture through the cheesecloth-lined sieve. Allow it to drip through naturally. Then, gather the corners of the cheesecloth and gently squeeze out as much of the precious, infused oil as possible. Be thorough – you don’t want to waste any! Discard the spent flowers (they make great compost!). You should now have a clear, golden calendula-infused oil.Step 3: Creating the Salve Consistency
Now, transform your infused oil into a smooth salve. You’ll need your double boiler setup again (or a clean pot and heatproof container). Pour your strained calendula oil into the top part of the double boiler or heatproof container. Add the beeswax pellets or grated wax (or candelilla wax if using). Gently heat the mixture over low, simmering water, stirring occasionally, just until the wax is completely melted into the oil. Avoid overheating. Testing the Consistency: Once the wax is fully melted, you can test the salve’s final texture. Carefully dip a cold spoon into the mixture and place it in the refrigerator or freezer for a minute or two until it solidifies. Check the consistency. If it’s too soft, add a tiny bit more wax, melt it in, and test again. If it’s too hard, add a little more infused oil, melt, and re-test. Remember, it’s easier to add more wax than to dilute it significantly later.Important: Handle with Care! Remember that melted wax and oil are very hot. Always use caution when working with the double boiler and pouring the hot mixture. Keep children and pets away from the work area during the heating and pouring stages. Allow the salve to cool completely before handling the containers extensively.


