
Content
Why Ditch the Can?
Let’s be honest, the convenience of aerosol shaving cream is hard to beat. But convenience often comes at a cost. Many commercial products contain ingredients like parabens, sulfates (like Sodium Lauryl Sulfate or SLS), triethanolamine (TEA), artificial colors, and synthetic fragrances. These can strip the skin of its natural oils, leading to dryness, irritation, and even allergic reactions for some people. Propellants like butane and propane are also standard, which aren’t exactly skin-loving components. Beyond the personal impact, there’s the environmental footprint of manufacturing and disposing of those aerosol cans. Switching to a homemade version means:- Knowing Exactly What’s Inside: No hidden chemicals or unpronounceable ingredients. You choose pure, simple components.
- Superior Moisturization: Natural oils and butters provide deep hydration, reducing dryness and irritation post-shave.
- Reduced Irritation: Without harsh chemicals, the likelihood of razor burn, bumps, and redness significantly decreases.
- Cost Savings: While the initial purchase of ingredients might seem like an investment, they last a long time, making DIY cream much cheaper in the long run.
- Eco-Friendlier: Less packaging waste, no aerosol propellants. Just pure goodness in a reusable jar.
- Customization: Tailor the scent and properties to your skin type and preferences using different essential oils or carrier oils.
Crafting Your Luxurious Homemade Shaving Cream
This recipe focuses on creating a rich, balm-like cream that melts slightly on contact with warm skin, providing excellent lubrication. It doesn’t foam like canned creams – think more like a thick, moisturizing lotion that allows the razor to glide effortlessly.The Core Ingredients: Your Path to Smoothness
The beauty of this recipe lies in its simplicity and the nourishing power of its components:- Shea Butter (1/3 cup): This is the heart of our cream. Rich in vitamins A and E, shea butter is renowned for its deep moisturizing and anti-inflammatory properties. It creates a protective barrier on the skin, helping the razor glide smoothly and preventing moisture loss. Look for unrefined, raw shea butter for maximum benefits.
- Coconut Oil (1/3 cup): Another powerhouse moisturizer, coconut oil adds slip and has natural antibacterial and antifungal properties, which can be beneficial for preventing folliculitis or razor bumps. Opt for virgin or extra-virgin coconut oil. It solidifies at cooler temperatures, contributing to the cream’s texture.
- Carrier Oil (1/4 cup): This adds extra glide and nourishment. Good choices include:
- Olive Oil: Extra virgin olive oil is readily available and very moisturizing.
- Sweet Almond Oil: Lightweight, easily absorbed, and great for sensitive skin.
- Jojoba Oil: Closely mimics the skin’s natural sebum, making it an excellent non-greasy moisturizer suitable for most skin types.
- Grapeseed Oil: Very light and easily absorbed, good for oilier skin types.
- Essential Oils (10-15 drops – Optional): These add fragrance and can offer additional skin benefits. Choose based on your preference and skin needs. Some popular options include:
- Lavender: Calming, anti-inflammatory, great for sensitive skin.
- Tea Tree: Antibacterial, good for acne-prone skin (use sparingly, as it’s potent).
- Sandalwood: Woody scent, soothing, good for dry skin.
- Peppermint or Eucalyptus: Cooling sensation, invigorating (use cautiously if you have sensitive skin).
- Chamomile: Very gentle, anti-inflammatory, excellent for irritation.
- Optional – Liquid Castile Soap (1-2 tablespoons): If you miss having *some* lather, adding a small amount of unscented liquid castile soap can provide a subtle bubbly quality. It also helps rinse the razor slightly easier. This is entirely optional; the cream works beautifully without it.
Step-by-Step: Making the Magic Happen
Making this shaving cream is easier than you might think. Grab your ingredients and let’s get started. 1. Melt the Solids: You’ll need a double boiler or a makeshift one (a heatproof bowl set over a saucepan with simmering water, ensuring the bottom of the bowl doesn’t touch the water). Combine the shea butter and coconut oil in the bowl. Heat gently, stirring occasionally, until completely melted and combined. Avoid overheating – you just want them liquified. 2. Incorporate the Liquid Oil: Remove the bowl from the heat. Stir in your chosen carrier oil (olive, almond, jojoba, etc.). Mix well until the mixture is uniform. 3. Cool It Down: This step is crucial for achieving the right texture. Let the mixture cool slightly on the counter, then place the bowl in the refrigerator or freezer. You want it to cool and start solidifying, but not become rock hard. Check it every 10-15 minutes. It should become opaque and firm around the edges, but still soft enough in the center to whip. 4. Add Optional Ingredients: Once the mixture has cooled and started to solidify (but is still soft), remove it from the fridge/freezer. If you’re using essential oils and/or castile soap, add them now. This prevents the heat from degrading the delicate essential oils. 5. Whip It Good: Using an electric hand mixer or a stand mixer with a whisk attachment, whip the mixture. Start on low speed and gradually increase. Whip for several minutes (usually 3-7 minutes) until the mixture becomes light, fluffy, and resembles thick whipped cream or frosting. Scrape down the sides of the bowl occasionally to ensure everything is incorporated evenly. 6. Transfer and Store: Spoon your luxurious homemade shaving cream into a clean, airtight container, preferably a glass jar with a wide mouth for easy access. Store it in a cool, dark place. If your bathroom gets very warm, the cream might soften significantly; some people prefer to store it outside the shower area or even in the fridge during hot weather for a cooling shave.Patch Test First! Before slathering your new creation all over, always perform a patch test. Apply a small amount to an inconspicuous area of skin (like your inner wrist or forearm). Wait 24 hours to ensure no irritation or allergic reaction occurs, especially if you’ve used new essential oils or have sensitive skin.
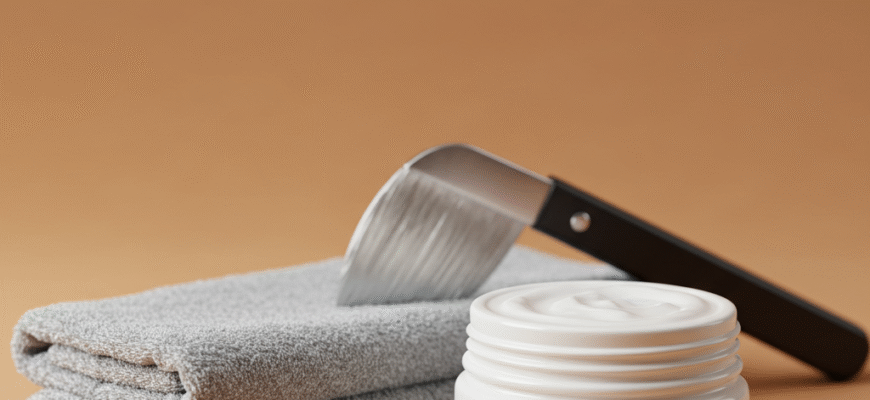
How to Use Your Homemade Shaving Cream
Using this natural cream is slightly different from using canned foam, but just as effective, if not more so.- Prep Your Skin: Shaving after or during a warm shower or bath is ideal. The warmth and moisture soften the hair and open the pores, making shaving easier and reducing irritation. Alternatively, apply a warm, damp towel to the area for a few minutes.
- Apply the Cream: Scoop out a small amount of the cream (a little goes a long way). Warm it slightly between your fingers – it should melt slightly on contact. Apply a thin, even layer to the damp skin you intend to shave. You don’t need a thick layer like foam; just enough to provide lubrication.
- Shave as Usual: Using a clean, sharp razor, shave with the grain of the hair growth using short, gentle strokes. Rinse the razor frequently under warm running water. Because this cream is oil-based, you might need to rinse the razor more often than with commercial foam to prevent clogging.
- Rinse and Pat Dry: Once finished, rinse your skin thoroughly with cool water to help close the pores. Gently pat your skin dry with a clean towel.
- Moisturize (Optional): Your skin will likely feel incredibly soft and moisturized already, thanks to the rich oils and butters. However, if you desire extra hydration, you can apply a light, natural aftershave balm or moisturizer.
Customizing Your Creation
The beauty of DIY is making it truly yours. Feel free to experiment!- Different Butter/Oil Ratios: Prefer a softer cream? Slightly increase the liquid carrier oil. Want it firmer? Slightly increase the shea butter (or try adding a bit of cocoa butter, which is harder).
- Vitamin E Oil: Adding a few drops of Vitamin E oil can boost the skin-nourishing properties and also act as a mild preservative, potentially extending the shelf life slightly.
- Clay for Slip: Adding a teaspoon of bentonite or kaolin clay during the whipping stage can provide extra ‘slip’ and help detoxify the skin. Mix the clay with a tiny bit of water or oil first to avoid clumps.
- Scent Blends: Get creative with essential oil combinations! Citrus oils like orange or grapefruit can be uplifting, while woodsy scents like cedarwood offer a grounding aroma. Just be mindful of photosensitivity with some citrus oils if applying before sun exposure.
Shelf Life & Storage: Since this recipe contains no water (unless you add castile soap) and no harsh preservatives, it relies on the natural stability of the oils. Stored properly in a clean, airtight container away from direct sunlight and heat, it should last for several months (typically 3-6). Always use clean fingers or a small spatula to scoop out the cream to avoid introducing bacteria. If it develops an off smell or changes texture drastically, discard it.Making your own shaving cream is a rewarding little project. It’s a step towards a more natural, skin-friendly personal care routine. Say goodbye to chemical cocktails and hello to a smoother, more comfortable shave that leaves your skin feeling genuinely cared for. Give it a try – your skin will thank you!


